With the release of iOS 9.3 Apple is now allowing a custom desktop setup where specific apps can either be whitelisted (allowed) or blacklisted (restricted). This means you can finally hide all the native iOS apps you won’t ever use. The only exemption is the Settings app. It will show up regardless of the whitelist or blacklist settings. This is available on devices that meet the following requirements:
- The device must be Supervised (can be done through DEP or Apple Configurator)
- The device must be running iOS 9.3 or greater
- A Restrictions profile must be installed on the device that specifies the whitelisted or blacklisted apps
Step 1 – Create the Restrictions Profile
- Go to the iOS Profiles tab in the top navigation

- Go to the iOS Profiles tab in the top navigation

- Click Restrictions then click New Profile

- Give the profile a name

- Give the profile a name

- Click the text box under the section your want to configure, either App Blacklist, or App Whitelist and select your app from the list, or enter the BundleID, see the next bullet point for a complete list of stock iOS apps
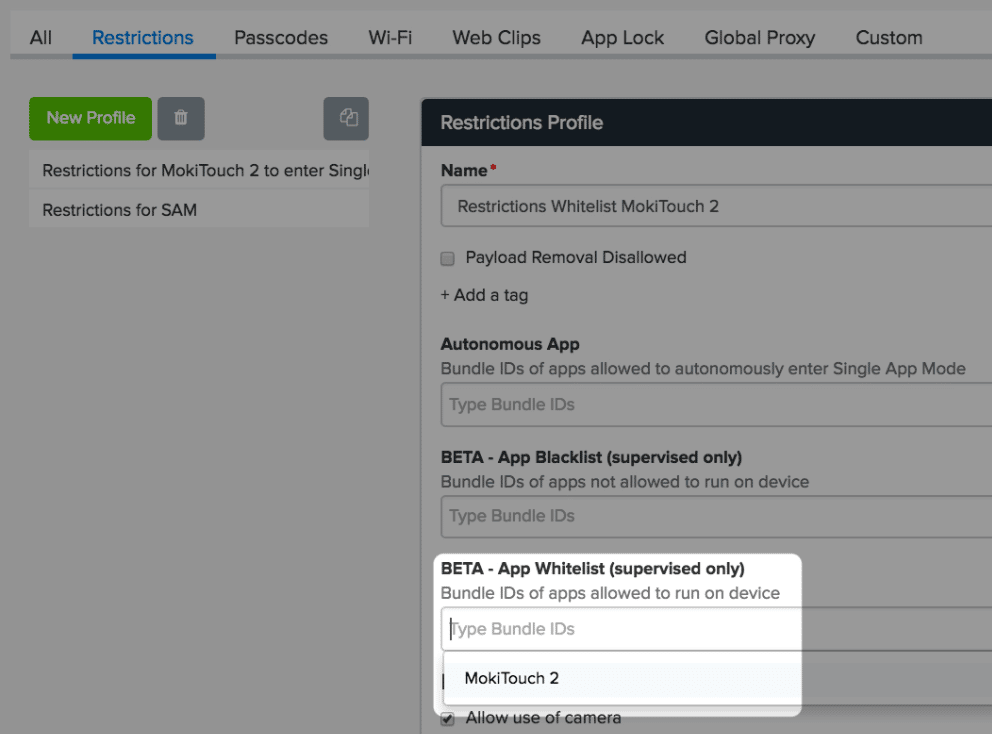
- Click the text box under the section your want to configure, either App Blacklist, or App Whitelist and select your app from the list, or enter the BundleID, see the next bullet point for a complete list of stock iOS apps

- BundleID for stock iOS apps
- com.apple.camera – Camera
- com.apple.mobilecal – Calendar
- com.apple.mobileslideshow – Photos
- com.apple.facetime – FaceTime
- com.apple.gamecenter – Game Center
- com.apple.MobileAddressBook – Contacts
- com.apple.Photo-Booth – Photo Booth
- com.apple.videos – Videos
- com.apple.Maps – Maps
- com.apple.mobiletimer – Clock
- com.apple.AppStore – App Store
- com.apple.reminders – Reminders
- com.apple.mobilenotes – Notes
- com.apple.iBooks – iBooks
- com.apple.MobileStore – iTunes Store
- com.apple.news – News
- com.apple.MobileSMS – Messages
- com.apple.mobilesafari – Safari
- com.apple.mobilemail – Native Email Client
- com.apple.Music – Music
- com.apple.mobileme.fmf1 – Find Friends
- com.apple.mobileme.fmip1 – Find iPhone
- com.apple.tips – Tips
- com.apple.podcasts – Podcasts
- BundleID for stock iOS apps
- Configure the rest of the restrictions the way you want. Because you can’t hide the Settings app we recommend that you look closely at the options limiting access to Setting’s functions (see the Restrictions section of our iOS Profile Definitions article for recommended settings to review)
- You can also combine the SAM lockdown method as well in this same profile by adding the app you want to lock the device to in the Autonomous App section. See the Entering and Exiting SAM article for more information
- Hit Save
Step 2 – Install the Restrictions Profile
After you have created your Restrictions Profile you can apply that to your devices. You can add this to your enroll code, apply it to your devices one by one or you can schedule when you want it to install. Refer to our article on scheduling actions if you want to apply it to all devices at once.
- Go to the Devices tab in the top navigation

- Go to the Devices tab in the top navigation

- Select the device(s) you want to apply the profile to
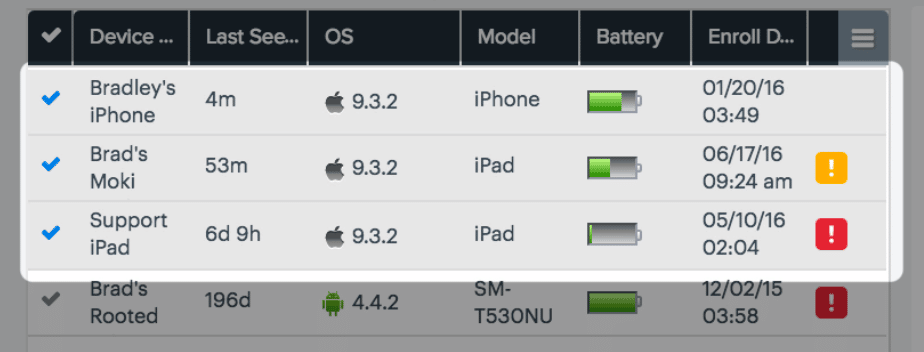
- Select the device(s) you want to apply the profile to

- Click the drop down that says Profiles and select your profile
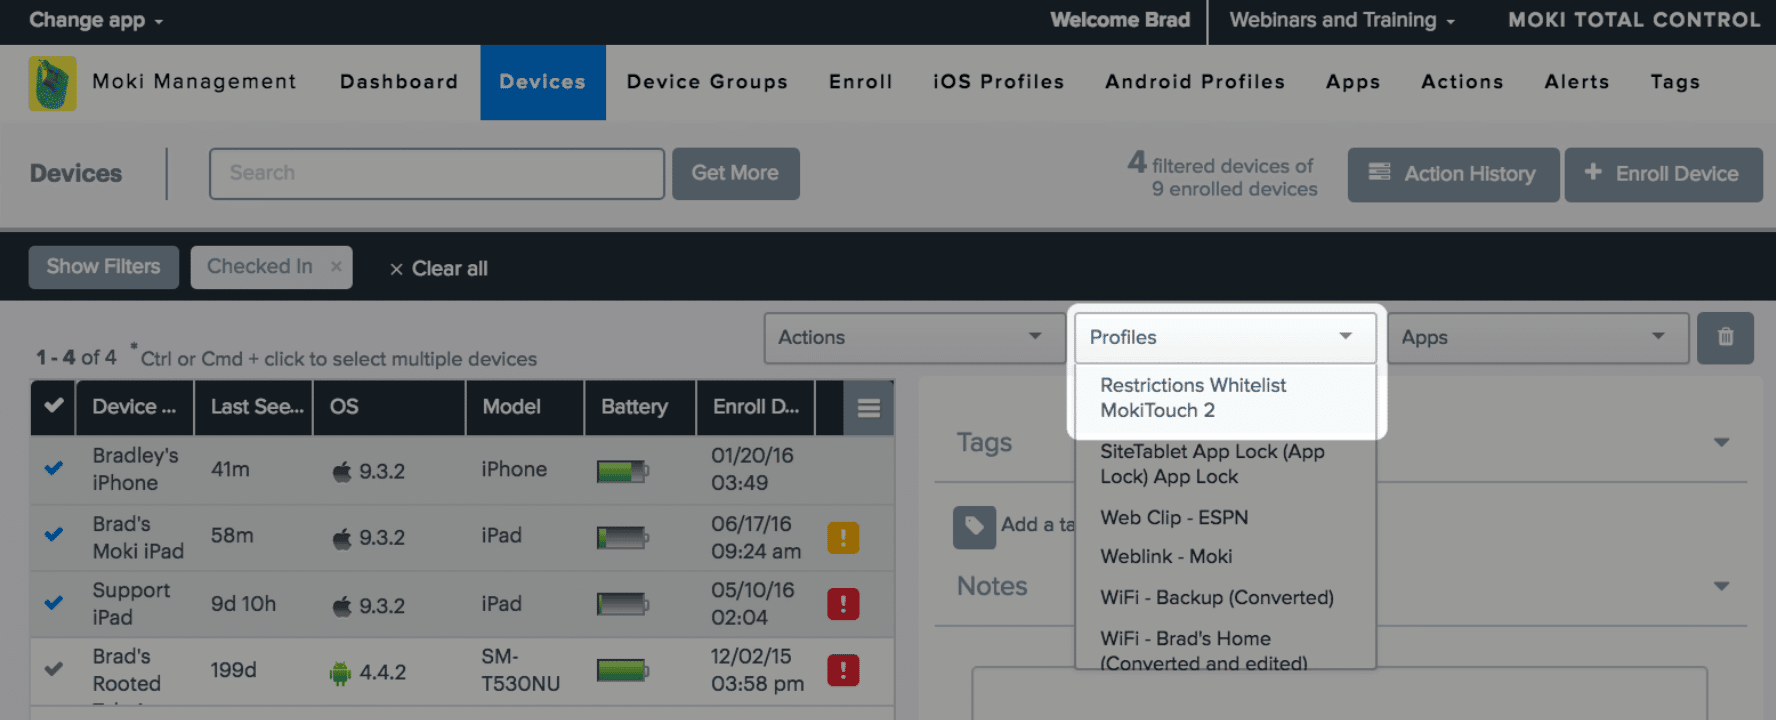
- Click the drop down that says Profiles and select your profile

- Confirm you want to send it to your devices
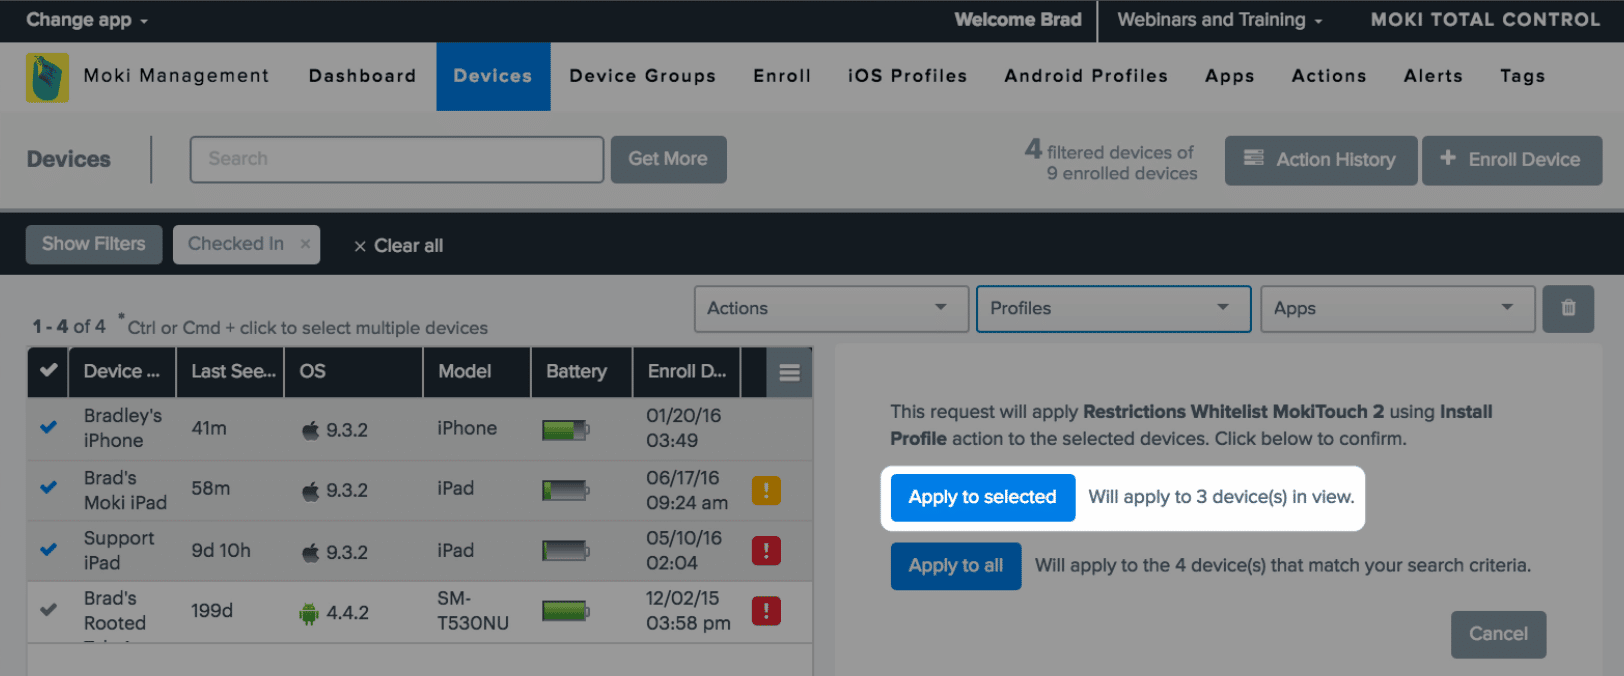
- Confirm you want to send it to your devices

- Once it is applied to your device you can rearrange the icons however you want. Here is one example where we’ve moved the apps into the Doc
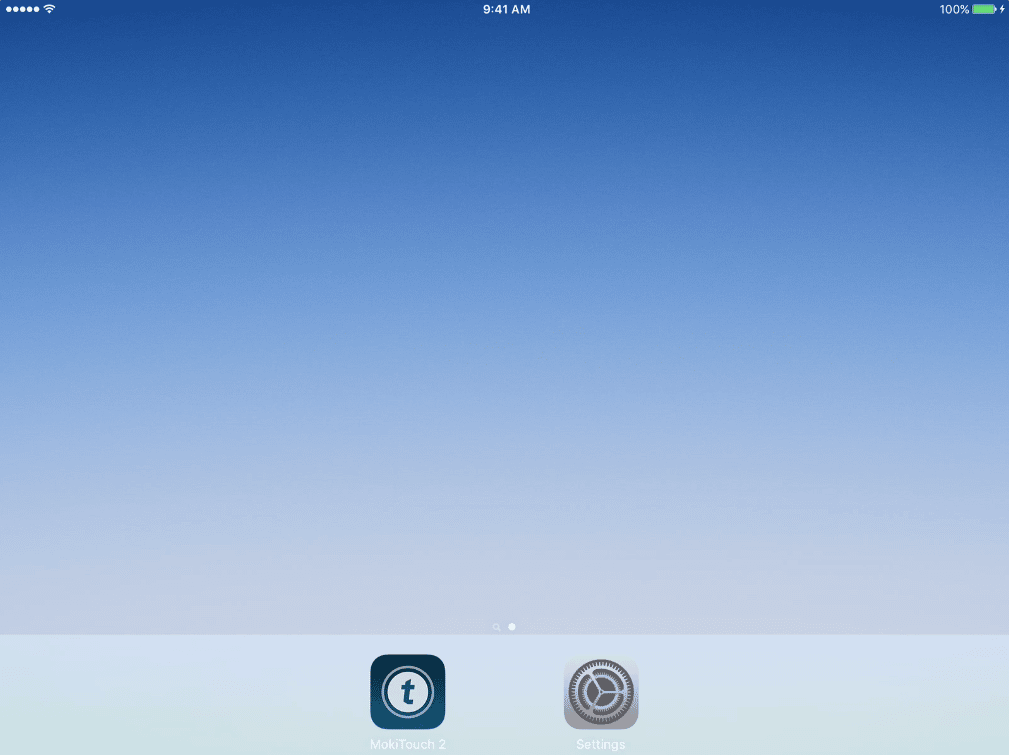
- Once it is applied to your device you can rearrange the icons however you want. Here is one example where we’ve moved the apps into the Doc

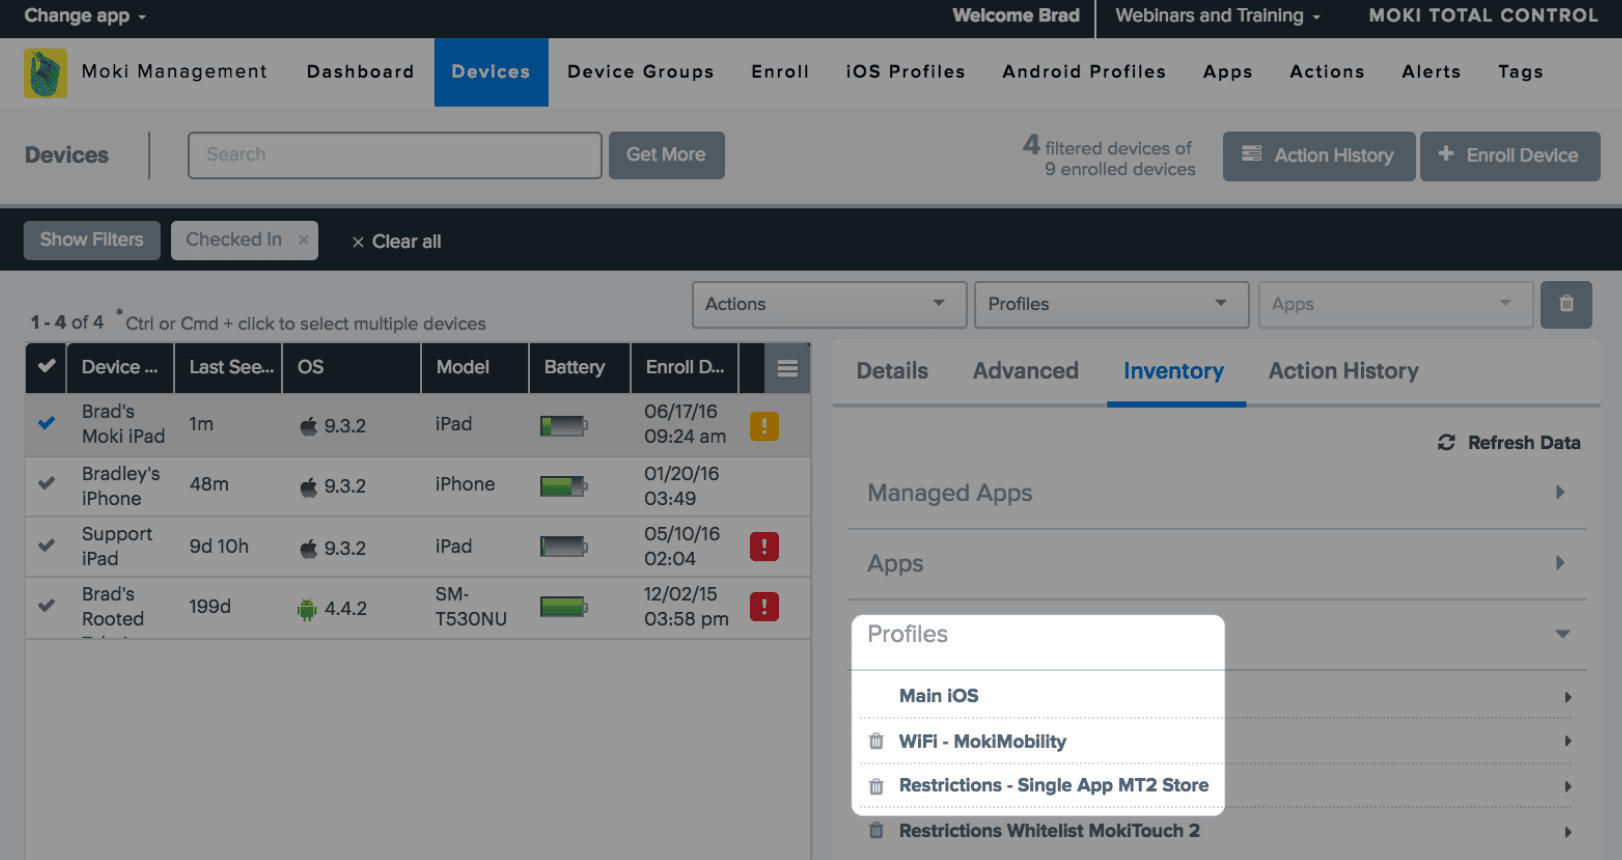
- If you want to remove the profile, click on your device and click the Inventory tab

- If you want to remove the profile, click on your device and click the Inventory tab

- Scroll down to the Profiles section and hit the trash can next to the profile